The Auto Backup feature allows you to specify when, where, and how often the system should back up your saved pages, toolbar settings, custom studies, text history, study modifications, and alerts.
You can schedule a future backup or back up your system immediately.
The Auto Backup window has three tabs:
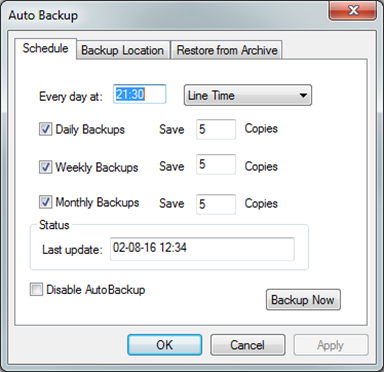
•Schedule: Initiate an immediate backup of your system, or schedule one for the future
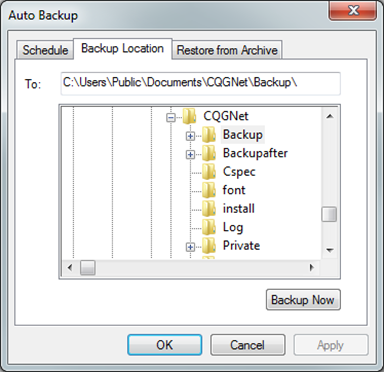
•Backup Location: Select the directory the backup files should be saved in
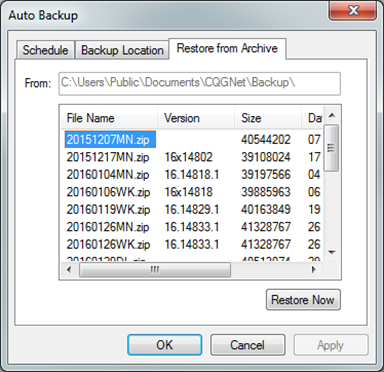
•Restore from Archive: Restore your system with one of these saved files
To back up your system immediately
This option is helpful when you want to save the data to removable storage:
1. Click the Support or System button.
2. Click Auto Backup User Setups.
3. On the Backup Location window, change the directory to the removable storage.
4. Click the Backup Now button.
If the removable storage location is temporary, make sure to change the directory.
If you are not saving the data to removable storage, click the Backup Now button on the Schedule window.
To restore your system to a prior state
Each time you back up your system, the backup is listed on the Auto Backup window. You can use this list to restore your system based on a particular date.
1. Click the Support or System button.
2. Click Auto Backup User Setups.
3. On the Restore from Archive tab, click the backup you want to use.
4. Click the Restore Now button.
To schedule an automatic back up
1. Click the Support or System button.
2. Click Auto Backup User Setups.
3. On the Schedule window, specify the time, frequency, and number of backup copies to save.
4. On the Backup Location window, specify the folder where the backups should be saved.
5. Click OK.
To disable automatic backups
1. Click the Support or System button.
2. Click Auto Backup User Setups.
3. On the Schedule tab, select the Disable AutoBackup check box.