It is important to remember that there is no way to undo actions in an EQSS. Before making changes you are unsure of, you might want to save the page, so that you can revert to it if necessary.
Entering Data in Cells
|
Cell Type |
Action |
|
Header |
Click a header cell and type. You can also press F2 to open the Specify Column Header Contents window. |
|
Symbols |
Click a cell, type the symbol, and ENTER. |
|
Comment |
Click a cell, type an apostrophe followed by your comment. |
|
Data |
To see trade data, turn on trading mode. Either click the Trade button, or right-click then click Trading mode. 1. Right-click a cell, point to Edit Cell, and click Contents. You can also press F2. 2. If you click a cell on a row that contains a symbol, then that symbol will be listed automatically and the field you choose will apply to that symbol. If you click a cell on a row that does not contain a symbol, then enter the symbol before choosing the field. 3. Choose whether you want to filter the available fields using the Select available fields from drop-down. 4. Click an available field name. 5. Click the Apply button. 6. Click the next cell that you want to format on EQSS. 7. Click the field name in the list of Available fields. 8. Click the Apply button. 9. When you have finished entering values, click OK. You can also type a formula directly into the cell: <symbol or expression>!<value name> The value name is found in the Available fields column on the Select Current Values window. Examples: SPM8!HIGH = today’s high for the June 08 S&P DJI!LASTQUOTETODAY = last quote today for Dow Jones Industrial Average
|
If the text entered into the cell does not begin with a comment character, CQG attempts to match the text to a known CQG symbol.
If you click a cell and then press ENTER, the cursor changes to indicate you are in edit mode. In edit mode, right-click in a cell to open the history list that allows you to choose a previously entered value.
Cut, copy, and paste cells
Cut, copy, and paste works as it does in any other software.
Right-click a cell, point to Edit Cell, and then click Cut, Copy, or Paste.
You can also use CTRL+C, CTRL+V, and CTRL+X.
Merge cells
Suppose you enter a long heading in a cell. You don’t want the text to be cut off, but you also can’t widen the entire column. You can merge cells to accommodate the heading.
Right-click a cell, point to Edit Cell, and then click Merge Right. Continue these steps until your heading fits across the cell. You can also press CTRL+M.
To undo the merge, right-click the cell, point to Edit Cell, and then click Un-merge. You can also press CTRL+U.
Cut, copy, and paste rows
Cut, copy, and paste works as it does in any other software.
1. Click a row number to highlight the row. Drag the mouse to select multiple rows.
2. Right-click the highlighted row, point to Edit Row, and then click Cut, Copy, or Paste.
You cannot use CTRL+C, CTRL+V, and CTRL+X.
Insert rows
Right-click a cell, point to Edit Row, and then click Insert Above or Insert Below.
You can add additional header rows in this way.
Delete rows
Right-click a cell in the row you want to delete, point to Edit Row, and then click Delete Row(s).
You can select multiple rows.
Sort rows
To put the rows in alphabetical order, right-click a cell, point to Sort Rows by Column, and then click Ascending or Descending.
Insert columns
Right-click a cell, point to Edit Column, and then click Insert Left or Insert Right.
Delete columns
Right-click a cell in the column you want to delete, point to Edit Column, and then click Delete.
Change column font
Right-click a cell, point to Edit Column, and then click Font. The font window is like the font windows you would use in other software.
Column preferences
1. Right-click a cell, point to Edit Column, and then click Preferences.
2. Type the number of decimal places you want shown. You can also use the arrows to choose a number.
3. Choose the cell alignment.

Gridlines
Right-click a cell, point to Edit Column, and then click Gridlines.

This window allows you to customize gridlines, so that you can emphasize certain areas of EQSS or provide visual cues to help you find information. Select the row or column check box, then select the type of line you want to display, and then choose how think you want that line.
The first setting, to show gridlines for all cells, is directly connected to preferences. If you change this setting, then the preference setting will change also.
When rows or cells are copied and pasted, gridlines specified for them are not pasted.
When a row or column is deleted, gridlines that were specified for that row or column remain.
Drag the border of the column until you reach the desired width.

Double-click the border, and the column will automatically resize to the smallest possible width.
Size to Fit
EQSS can be sized, so that empty rows and columns will disappear.
Click the Setup button and then click Size to Fit.
Copying Data to Excel
1. Select the data from EQSS.
2. Right-click one of the selected cells.
3. Click Copy to Excel.
4. In Excel, click a cell.
5. Press CTRL+V to paste the data.
When pasted into Microsoft Excel, each value cell becomes a live-update real-time DDS link.
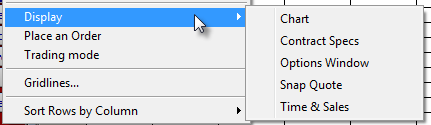
Opening other applications
Right-click EQSS, point to Display, then click an application. To open a trading application, right-click, then click Place an Order.